My assignment: two students and their teacher who discovered something in space. This sounded like a great opportunity to create a concept photo, one that went beyond teachers and students working in a classroom. But what could the photo be? How could I illustrate it? I spend a few weeks thinking about it. Coming up with ideas only to scratch them off. I finally decided to use a technique called light painting.
When I e-mailed Rowan County High School teacher Jennifer Carter, I requested a bit of time and a room that could go completely black. Luckily for me, she didn’t question it and was able to provide.
Senior Hannah Mabry and sophomore Jennifer Pal warmed up quickly to the photo idea. Their friends eagerly accepted my invitation to be photo assistants, helping with the room lights and drawing stars. The photos were turning out so well, and we were all having such a great time, we took advantage of having extra time and made some fun photos.
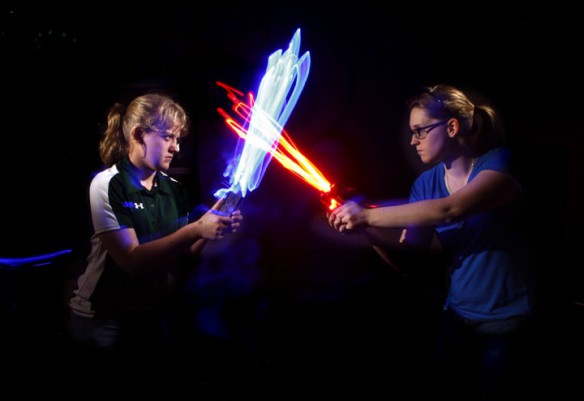
Light painting is fun, creative and surprisingly simple. All you will need is a dark space, a camera that can take a long expose, a tripod and hand-held light source like a flashlight or LED keychain light. With your camera on the tripod, select a slow shutter speed or the bulb setting on your camera. Thirty seconds was enough time to do the “painting” in these pictures. You may need more or less. If your camera has a timer, you can use that so you can hit the shutter and then be in place to draw. Draw with your lights pointed at the camera. Or you can draw on objects as well. You will not see yourself drawing in the picture unless you direct the light on you. Experiment with different light sources and colors. There are many online tutorials for further instruction and ideas.
Give this a try with your students, and send me the results. I would love to see what creative ideas they come up with. We will run the best ones in an upcoming issue of Kentucky Teacher.

Astronomy teacher Jennifer Carter and senior Shabina Pal play the role of strict physics teacher and stunned student at Rowan County Senior High School. Photo by Amy Wallot, March 16, 2012

Sophomores Kara Lewis and Allison Fletcher with light painted lightsabers at Rowan County Senior High School. Photo by Amy Wallot, March 16, 2012

Sophomore Jessica Pal and senior Shabina Pal have fun with light painting at Rowan County Senior High School. Photo by Amy Wallot, March 16, 2012

Jennifer Carter, center, with senior Hannah Mabry and sophomore Jessica Pal at Rowan County Senior High School. Photo by Amy Wallot, March 16, 2012


Check out http://lightpaintingphotography.com/ to learn all about Light Painting Photography.